This article shows you how you can make better use of the notch camera, which you get in the center of the screen of your Samsung Galaxy A51/A52/A71/A72. This article shows you how to enable a beneficial LED notification light around the notch.
Whenever you receive any notification, you will have this beautiful LED light blinking around the camera cut-out. Read this article to the end so that you won’t get stuck along the process and for everything to work correctly.
Although the Samsung Galaxy A72 and A52 do not have any LED indicator light, you can accomplish comparable effects by using the Edge Lighting and Flash notification capabilities that come with the smartphone to replicate the LED indicator light.
Alternatively, you can also use a third-party app to enable this feature. The most popular and very effective are aodNotify and Always-on Edge Notification.
This article shows you how to enable using the Edge Lighting and Always-on display. Suppose you’d love to use aodNotify; check out how to enable LED notification on Samsung Galaxy S21 Ultra. The process is similar.
With that said, here is how to enable LED notification Light on your Samsung Galaxy A71 or A72 smartphone.
Read Also: Samsung One UI 4.0 New Features
How to Enable LED Notification Light on Samsung Galaxy A72/A71
Using Edge Lighting And Flash Notification
Edge Lighting
When you receive a notification or an alert, the edge lighting function illuminates the edges of your phone’s screen to provide a visual signal. This is a good option if you don’t want to miss a notice even while the smartphone is locked or silent.
This does not create a beautiful LED around your phone’s camera but creates a stunning LED light around the edges of your phone.
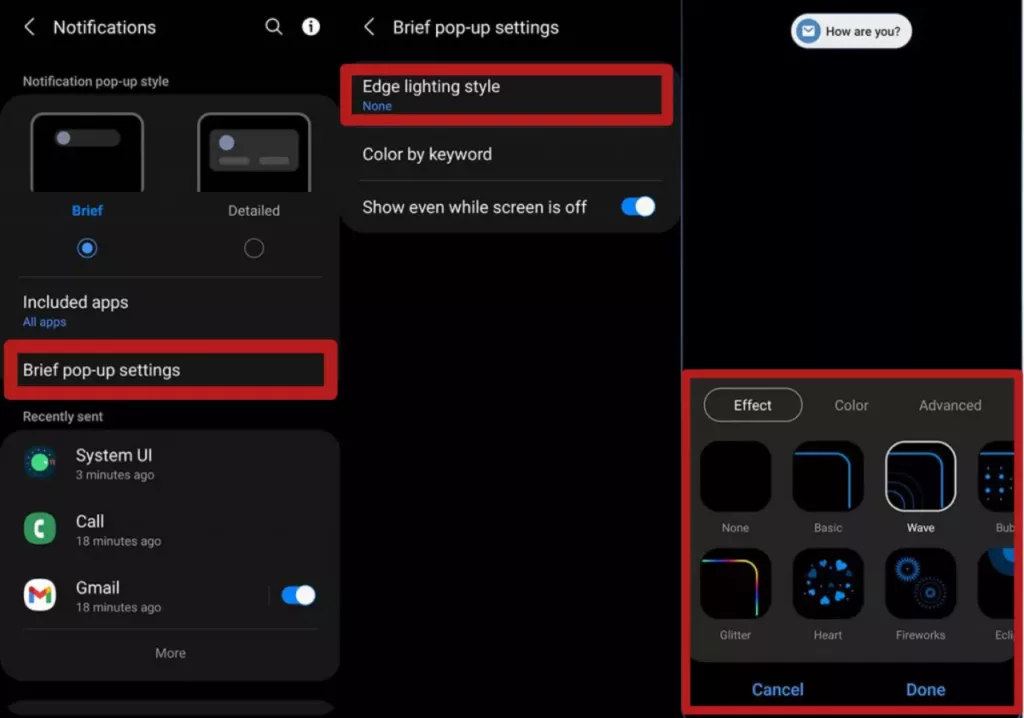
Here is how to enable Edge Lighting
- Go to the Settings menu.
- Select Notifications from the menu bar.
- Select Brief pop-up settings from the drop-down menu.
- To select and choose the edge lighting effect you want, tap the Edge lighting style.

Flash Notification
If you’d love to receive a flash notification, that is, flash the camera light or screen when you receive a notification, then you should enable Flash notification.
The following instructions show you how to enable and use the flash notification feature.
- Go to the Settings menu.
- Select Notifications from the menu bar.
- Scroll down to “Looking for something else?” and touch on Flash notification.
- Toggle the On/Off switch for the camera flash notification (This will flash the camera light on the back of your phone)
- Toggle the On/Off switch for the screen flash notification (This will flash the front screen)
Using Always-on Edge Lighting
The steps above do not display a beautiful notification light around the edges of your camera as this article intends. The Best way to enable this feature is using a third-party app like aodNotify and Always-on Edge Display.
Follow this process if you don’t like the first method and want something more beautiful than that.
Step 1
First, go to your play store and search for the application called Always on edge Lighting. It’s a free application. You can also visit this link to download the app.
Step 2
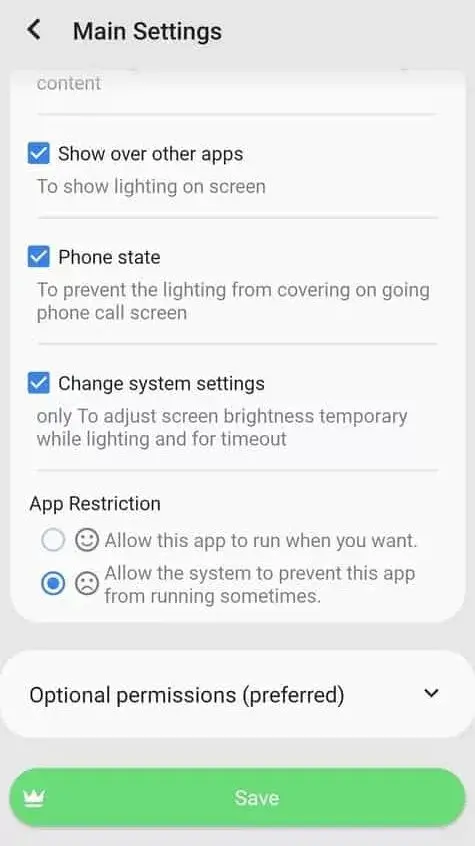
Once you’re done, open the app, and you will get the interface below. First, go to Main Settings and then Require permissions. Select Independent lighting controller, and it will ask you for accessibility permission. Grant it and also allow permissions for notification access and show other apps as well.

These are some basic permissions, so you don’t need to worry; once you are done scroll down and Save the settings.

Step 3
Next, go to App settings. Select when to turn on edge lighting, then enable the option called when a notification is received, and the screen is off. With that said, you don’t have to change any other settings in this menu. So scroll down and save your settings.

Step 4
Now, go back to the main menu and select Lighting settings. From here, select Lighting placement. It will be set as around the whole screen by default, but I recommend choosing around notch only.
If you still want the lighting around the whole screen, you can choose the other option as well. It’s totally up to you.
Next, go to the enable notch support option and set it as adjust manually as you will notice that the LED light is not placed perfectly around the notch. So, it would be best if you changed the dimensions manually.
- Set the notch width as 52
- Notch height will be 46
- Curve radius will be 40 and set the top as 36
Once you are done with all the dimensions, you will have a perfectly placed LED light around your notch. If you want, you can also adjust the thickness.
I will recommend you to keep the thickness at 8 or 10. Other than all these settings, we also have some other customizations.

- LED Styles– You can change the LED styles. There are many different styles, such as sparkle, pulse, flicker, shine, worm, and more.
- LED Color– You can also change the color. You can have rainbow color, which looks fabulous, or you can use your color.
- Lighting Effects– it also lets you change the lighting effects as well. I love this glow effect which makes the LED light glow on your screen.
After customizing your LED light, make sure to save the settings.
Step 5
Finally, go to enabled apps and check if all the apps are enabled. You can also set different LED colors for various applications. So it will be straightforward for you to know from which application you have received the notification.
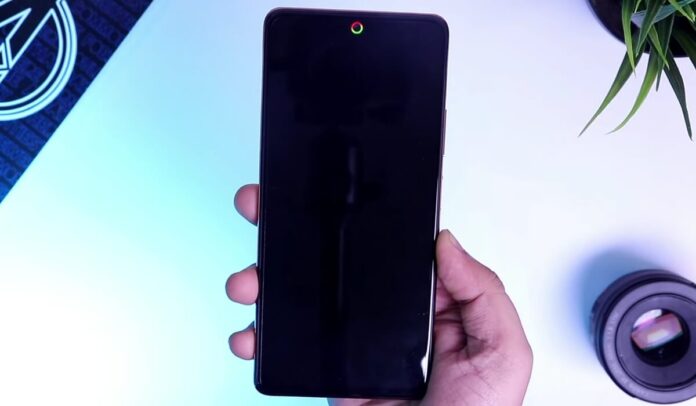
Once you are done with all these Settings, whenever you get a message or any notification, you will have this very Beautiful light blinking around your notch.
This light will blink only for eight seconds, but if you want to extend it, you can easily do it by going to the App settings and enabling the Repeat light for every eight seconds or so.
That’s pretty much it, guys. This is how you can easily enable the LED light on your Samsung Galaxy A72, A71, A52, or A51.


