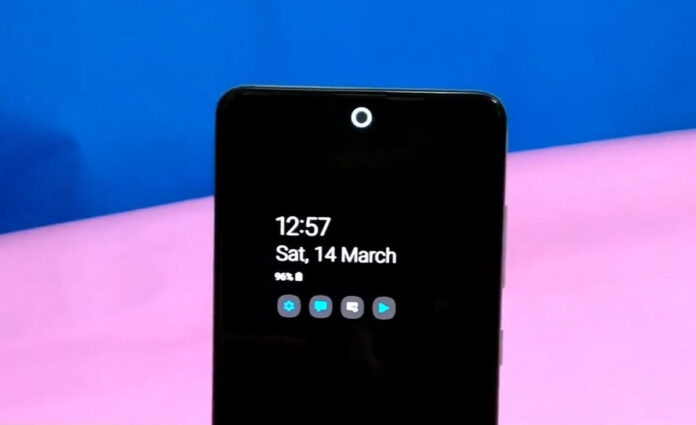
In this article, I will explain how to enable and turn on the notification light on your Samsung Galaxy A series phone, including the Samsung Galaxy A53, A54, A73, and A74. The process is the same for all of these phones.
Notification lights on Samsung phones are small LED lights on a device that blink or change Color to alert the user of a new notification, such as a new message or missed call. They can be customized to flash different colors for different types of notifications.
There are various notification light options on Samsung Galaxy phones. You’ve got edge lighting that lights up the edges of your phone and Flash lighting that enables your phone back camera flashes. You can also turn your phone’s punch-hole camera into a notification light. Enabling the notification light allows users to be alerted to new notifications without constantly checking their devices.
The rest of this article explains how to enable flash lighting, Edge Lighting, and turn your phone’s punch-hole camera into a notification light.
How To Enable Edge Lighting on Samsung Galaxy A53/A54/A73/A74 Phone
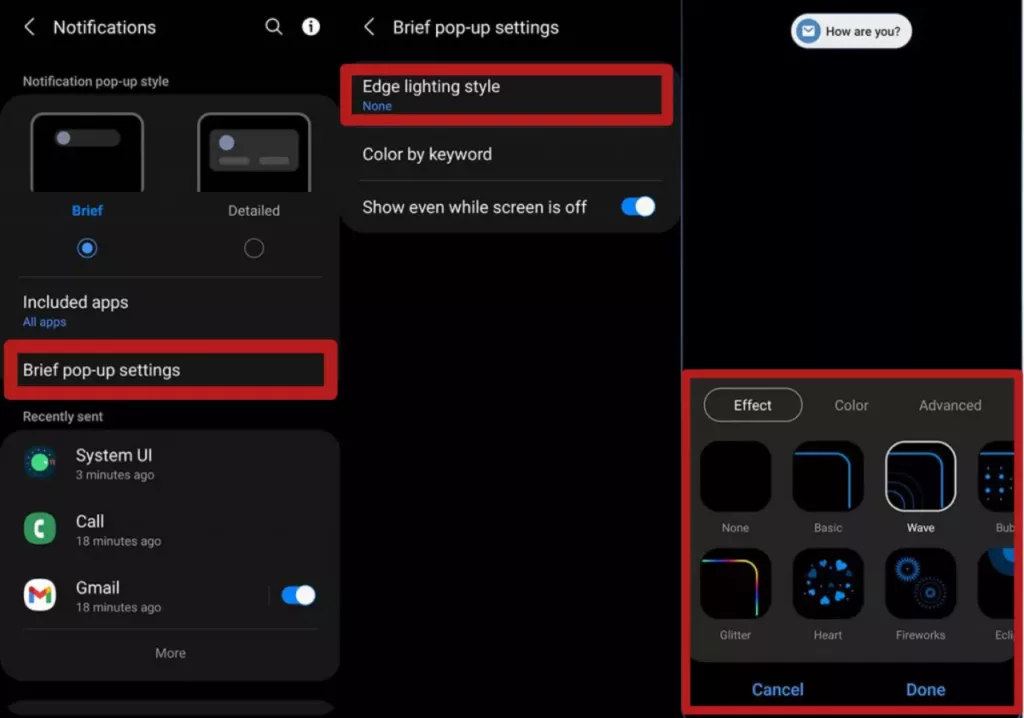
Before getting into where things get technical, let’s first see how to enable the new Edge Lighting feature on the Galaxy A53, A54, A73, and A74. This feature displays beautiful lights on your phone’s edges when you get notifications.
Follow this process to enable Edge Lighting on Samsung Galaxy A series phones.
- Go to Settings
- Tap Notifications
- Tap Brief pop-up settings
- Tap the Edge lighting style to select and choose the edge lighting effect you want.
How to Enable Flash Notification on A53/A54/A73/A74 Phones
The Flash Notification feature makes your phone screen flash or display flash whenever you receive any notification. To enable this feature, follow the instructions below;
- Go to Settings
- Tap Accessibility
- Tap Advanced settings
- Tap Flash notification
- Toggle the Camera flash notification to On (This option will flash the camera light on the back of your phone)
- Toggle Screen flash notification to On (This option will flash the front screen)
Alternatively, you can access this feature by Navigating Settings > Notification > Flash Notification.
How to Enable LED Notification Light on Samsung Galaxy S10 Phones
Here is where things get technical, so you must follow the process. To enable the beautiful LED Notification mentioned earlier, you must install an app called aodNotify or Always-on Edge.
This article only shows how to enable the LED Notification using and notify. Here are the steps for enabling LED Notifications.
Step 1: Installing the necessary app
You first need to go to the Google Play Store and search for and download an app named “aodNotify.”
Alternatively, visit this link to the Google Play Store. The app below is the Actual App you are looking for.

When you’ve finished downloading and installing this software, start it, and you should be redirected to a welcome screen that looks like the first column in the image below.
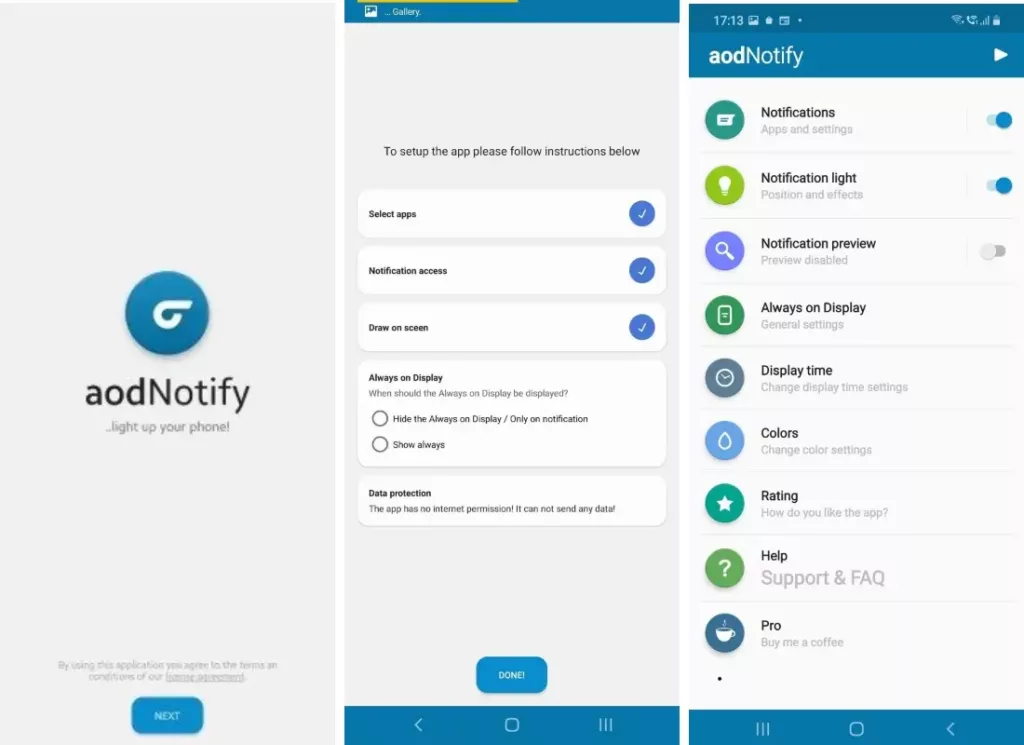
Press the “NEXT” button at the bottom of your screen from this screen, and you’ll be led to a new screen where you’ll be asked to grant the app access to all of the fundamental rights that will be requested.
Of course, once you’ve finished configuring the required permissions, hit the “DONE” button at the bottom of your phone’s screen, and you should be taken to the app’s main menu page or homepage.
Step 2: How to Set Up LED Notification Light on the Samsung A53/A54/A73/A74 phones
Touch on the first setting option, Notifications on the homepage, and make sure the toggle button in front of it is turned on, and you should see a new screen that looks like the first column in the image below.
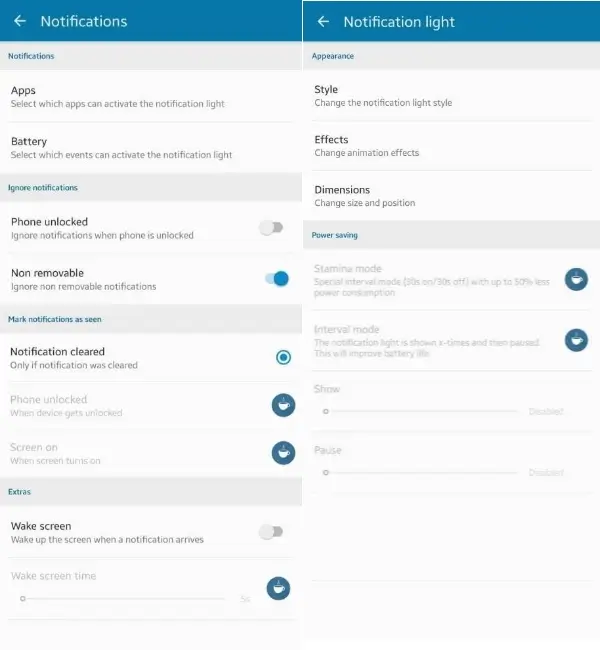
This page allows you to customize how the app interacts with your phone by specifying which apps or battery events are permitted to display notifications. This does not alter your phone’s standard notification settings.
When you’re finished setting this page, return to the Main Menu page and tap on the second setting option, Notification light, and make sure the toggle button in front of it is switched on if it was off by default. You should see a new page like the second column in the image above.
Using the three independent customization choices available on this page, you can personalize the virtual hole punch notification LED. Dimensions, Style, and Effects

Style– The Style option allows you to choose which portions of your phone screen should display the virtual hole punch notification LED.
You can select to display it around your phone’s camera edges or the edges of your screen. We’re going to set ours to indicate around the camera edges of our Samsung Galaxy A53/A54/A73/A74 phones for the sake of this tutorial.
Effect– You can apply multiple animation effects to your hole punch notification LED using “Effects,” but you only get three of them if you use the program’s free version; the paid version gives you a lot more.
Dimensions– Dimensions allow you to resize and relocate your Galaxy S10 phone’s unique hole punch notification LED if necessary. But I’m guessing the app worked it out independently, so you don’t have to do much here.
Step 3
Go back to the Main Menu and select the following option: Always-on Display. Here, you can choose when the light should display. You have three choices; only on-display, tap to show, and show always.
I will advise you not to choose the always show option because this option might drain your phone’s battery.
This page allows you to connect the app to your Galaxy phone’s native always-on display functionality to seamlessly work together.
You may customize how the Notification LED appears on your phone using the native always-on display feature from here.
Step 4: Enable LED Notification Light on Samsung Galaxy A53/A54/A73/A74 Phones
Return to the Main Menu, and this time, tap on the following configuration option labeled Display time, and you should be taken to a new page like the one below.
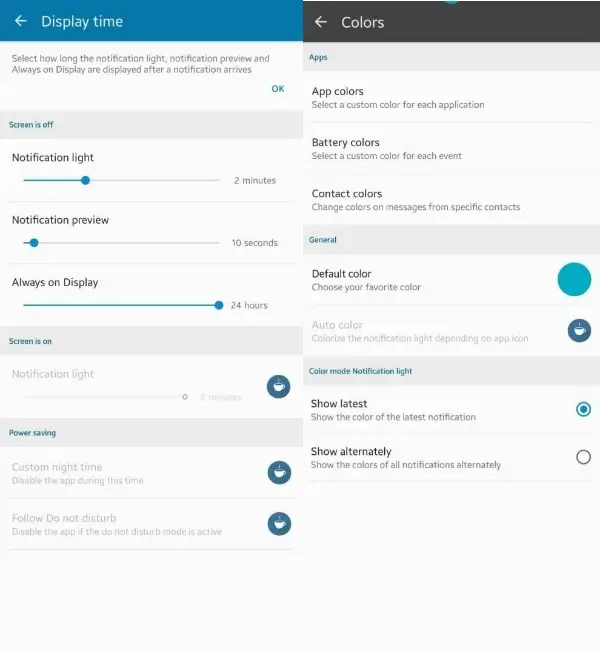
You may customize how long the Notification LED on your Samsung Galaxy S10 phone stays on when you receive a new notification from this page.
You don’t have many settings here, so just set everything up as you want. When you’ve finished with the above settings, return to the Main Menu for the last time.
Step 5
This time, click the next setting option, Color, and you should see a new page that looks like the one in the second column of the image above.
This page allows you to add colors to your custom hole punch notification LED to give it a final touch. You may select different colors for notifications from various apps, different colors for displaying your phone’s battery percentage, and even different colors for your contacts.
So, go ahead and set things up the way you want them, and then join us for the next phase, where we’ll put the app and all of our settings to the test.
Step 6
Now is the time to put the app to the test and ensure that all of the settings we’ve made so far are working correctly.
So, close the app and turn off your phone’s display, then grab a second phone and send your phone anything that would provoke or trigger a new notification. A direct and brief text message will suffice.
Suppose you followed all of the methods described and discussed above correctly. In that case, you should see a light ring illuminating your phone’s camera hole-punch cutout, as well as its natural always-on display feature.
You now have a customized virtual hole punch-inspired Notification LED on your Samsung Galaxy A53/A54/A73/A74 phones.
Please let us know if this worked or didn’t work for you in the comments section below, as well as what parts of it you’re having trouble with if it didn’t, and while you’re at it.


