You have just bought yourself a brand new Redmi Note 10, Note 10 Pro, Note 10S, or even the Note 10 Pro Max. You want to make better use of the center camera cutout that we get in the Note 10 series of smartphones, and then this article is super helpful for you.
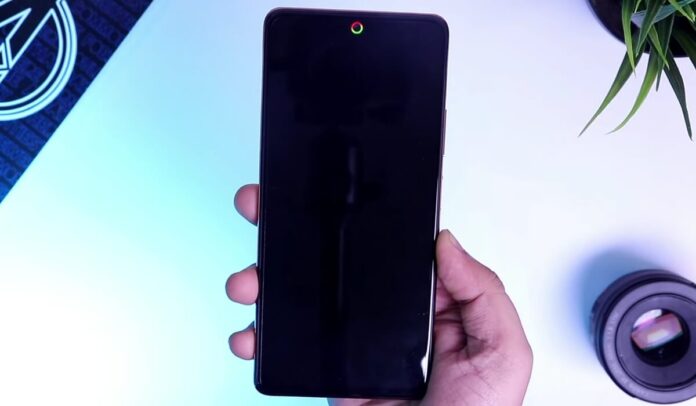
This article shows you how you can easily enable beautiful LED light around the Notch of your front camera. So, whenever you receive any notification or message from your friend, you will have this LED light blinking around your camera cut out.
The steps might seem tricky, so you have to follow all the procedures to the end. If you miss any step, you won’t be able to get this feature working on your device.
Without further ado, Let’s dive in.
How to Enable LED Notification Light on Xiaomi Redmi Note 10, Note 10 Pro and Note 10 Pro Max
Step 1:
The first thing you need to do is head over to your Play Store and search for this application called Always on Edge Lighting (AOE). It is free to download, and you can also visit this link.

Step 2:
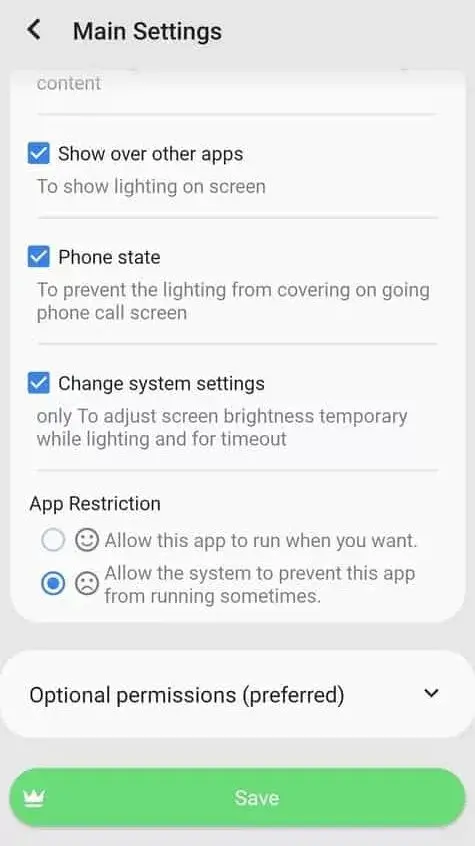
After the installation is complete, launch the app for the first time, and the app will direct you to the Main menu. Go to Main settings. Click on required permissions and enable the option called Independent lighting controller. The app will ask you for accessibility permission, so allow it from your settings.

Step 3:
Now go back and grant permission for Notification access as well. Finally, you need to allow one more permission for display over other apps. These are some basic permissions, and you don’t have to worry about anything once you have granted all the required permissions. Save the settings by clicking on the free option, then go back to the main menu.
If you are not getting the settings right, Watch the video below;
Step 4:
This time select App Settings. Here you need to confirm when you want this LED light on your camera cut out. You can go ahead and choose when a notification is received, and the screen is off. Also, make sure to grant permission for notification access. That’s it, scroll down, and you don’t have to change any other settings on this page. So tap on the Save button.

Step 5:
Finally, select Lighting Settings from the main menu and click on the option called Lighting Placement. Now, select the option called Around Notch only. If you want the LED light blinking around the whole screen, you can choose that as well, but I will recommend you select around Notch only.
Next, go to enable notch support and set it as Adjust manually. Here you will get a different notch type. Since Redmi Note 10 comes with the O-shaped Notch, select the notch type as O and place it on the center since the Note 10 series camera is placed at the center.

It would be best if you changed the dimensions as well. Make sure to keep the notch height and width as 42, the curve radius will be 15, and the top size will be 32.
Once you are done with all the dimensions, set the edge thickness as 8, you will have a perfect LED light Blinking around your camera cutout.
Other than this, you also get the option to select different styles for your LED light, such as shine, flicker, sparkle, pulse, and more. It even lets you change the color and the effect as well.
There are so many customization options available, and you can play around with these settings. Once you are done Customizing your LED light, save the settings, and that’s it now.
Whenever you receive any messages or notifications, you will have this beautiful LED light blinking around the camera cutout, which I think looks great on the Redmi Note 10.
This led light will blink only for 8 seconds. If you want to extend it even further, you can easily do it by going into the App settings and selecting the option called Repeat lighting. You can choose every 15 seconds or whatever comes to your mind.
Conclusion
So, that’s pretty much it. If you still face any issues, then let me know in the comment section below. I will surely help you out.


